
Saturday, August 13, 2011


Sunday, July 31, 2011

Thursday, May 5, 2011
Macro Photography
From Wiki-
Macro photography is close-up photography of usually very small objects. The classical definition is that the image projected on the "film plane" (i.e., film or a digital sensor) is close to the same size as the subject.
In recent years, the term macro has been used in marketing material to mean being able to focus on a subject close enough so that when a regular 6×4 inch (15×10 cm) print is made, the image is life-size or larger. With 35mm film this requires a magnification ratio of only approximately 1:4, which demands a lower lens quality than 1:1. With digital cameras the actual image size is rarely stated, so that the magnification ratio is largely irrelevant; cameras instead advertise their closest focusing distance.
Macroscopy competes with the digital microscope where a small camera tube can be attached directly to a computer, usually via USB port. Macroscopy also competes with photomicroscopy, and it is much less expensive to achieve high quality images. However, high magnification images are more difficult using macroscopy.
The method is especially useful in forensic work, where small details at crime or accident scenes may often be very significant towards solving the crime. Trace evidence such as fingerprints and skid marks are especially important, and easily recorded using macroscopy. Fracture surfaces from broken products are very revealing using fractography, especially when photographed using glancing light to highlight surface details.Technical considerations
Depth of field
Limited depth of field is an important consideration in macro photography. This makes it essential to focus critically on the most important part of the subject, as elements that are even a millimetre closer or farther from the focal plane might be noticeably blurred. Due to this, the use of a microscope stage is highly recommended for precise focus with large magnification such as photographing skin cells. Alternatively, more shots of the same subject can be made with slightly different focusing lengths and joined afterwards with specialized focus stacking software which picks out the sharpest parts of every image, artificially increasing depth of field.
 Compact digital cameras and small-sensor bridge cameras have an incidental advantage in macro photography due to their inherently deeper depth of field. For instance, some popular bridge cameras produce the equivalent magnification of a 420 mm lens on 35-mm format but only use a lens of actual focal length 89 mm (1/1.8″-type CCD) or 72 mm (1/2.5″-type CCD). (See crop factor.) Since depth of field appears to decrease with the actual focal length of the lens, not the equivalent focal length, these bridge cameras can achieve the magnification of a 420 mm lens with the greater depth of field of a much shorter lens. High-quality auxiliary close-up lenses can be used to achieve the needed close focus; they function identically to reading glasses. This effect makes it possible to achieve very high quality macrophotographs with relatively inexpensive equipment, since auxiliary closeup lenses are cheaper than dedicated SLR macro lenses.
Lighting
 Ring flashes, with flash tubes arranged in a circle around the front of the lens, can be helpful in lighting at close distances. Ring lights have emerged, using white LEDs to provide a continuous light source for macrophotography.
Homemade flash diffusers made out of white Styrofoam or plastic attached to a camera's built-in flash can also yield surprisingly good results by diffusing and softening the light, eliminating specular reflections and providing more even lighting.
Saturday, April 23, 2011

Wednesday, April 20, 2011


Sunday, April 10, 2011
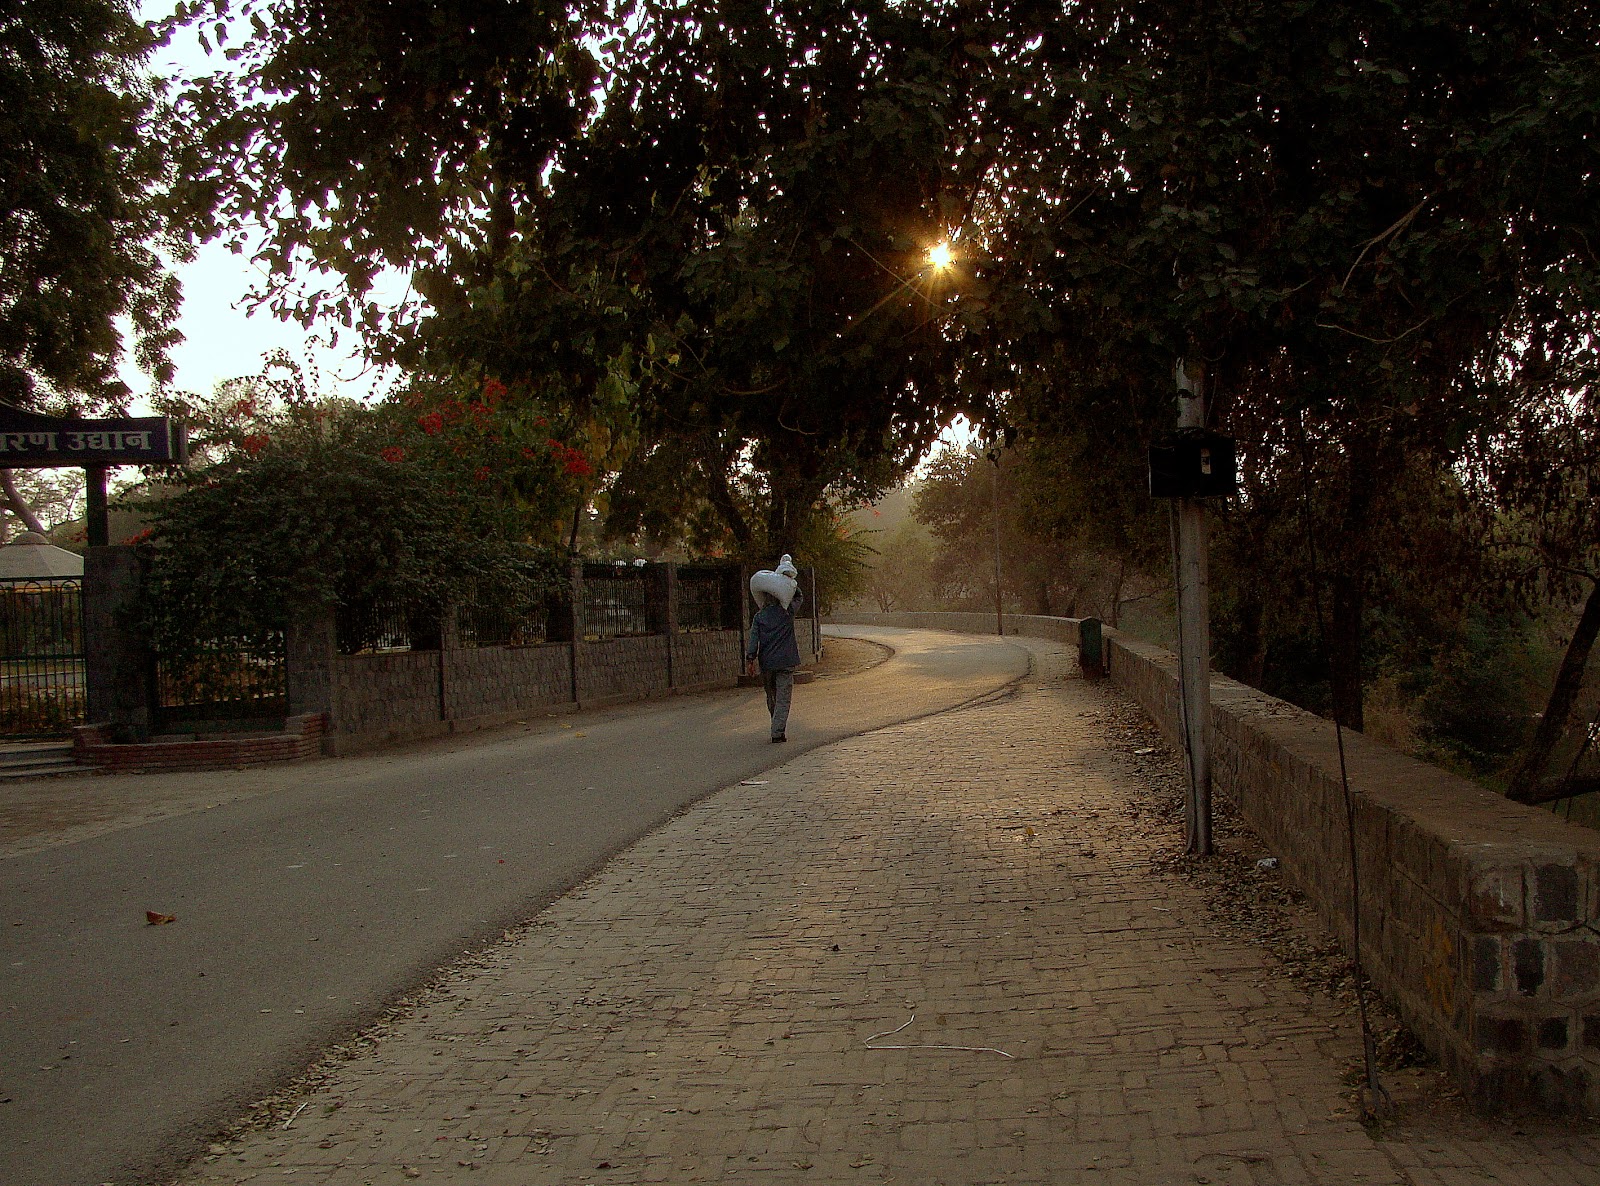
That Sunset
If you like taking sunset photos, you’re not alone. Many photographers I know love to take shots of sunsets. Perhaps its because they imbue a sense of peace in us.
Perhaps they’re a challenge to take given the small time window during which the sun sets.
You need to be very attentive and fire off many shots during the few seconds the sun goes down. It is also useful to apply multiple exposure settings in these kind of shots.
This article will show you some tips for shooting beautiful sunset photos.
 Tip 1: Get a Full View
When shooting sunsets, it’s important to position yourself so that you get a full view of the sunset. An example is to perch yourself on a high point. Another good idea is to catch the sun reflecting off water. I also like to photograph the sun setting between the leaves of trees. Think about different, creative ways of viewing a sunset. It will help enhance the beauty of your shots.
Tip 2: Keep Shooting
Here’s another tip for shooting sunset photos. Keep shooting! This is very important because there is only a small time window during which the sun sets. Get in as many shots as you can and select the best. With practice, your sunset photos will start looking better and better.
Tip 3: Clouds
When shooting sunset photos, clouds make a nice backdrop. Clouds add color and texture to an otherwise uninteresting photo. Try to look for cloudy skies to add more variety and texture to your photos.
Tip 4: Shooting Off-Center
Another tip I recommend is to shoot the sun off-center. It’s not essential to keep the sun right in the center of the photo. You can position the horizon at bottom of the frame, so that you can highlight the sky, or perhaps focus on a subject in the foreground. Try this, you can get many interesting silhouette effects.
Tip 5: Use Multiple Exposure Settings
A good thing to try is to use multiple exposure settings. I use a technique called bracketing (which simply means shooting the same picture at different exposures) to get the best shot. If the picture is too bright, underexpose it and vice versa. To bring out details of a person in the foreground, try using the fill flash or night mode. Experimenting with exposure is very important for getting the best looking sunset photos.
Tip 6: Zoom In
Always bring along a telephoto lens when shooting sunsets. That way, if you suddenly have an urge to make the sun larger and more impressive, you can simply zoom in. Some of the best shots of sunsets I’ve seen are done with long focal lengths in this manner.
Conclusion
 Sunset photos are a pleasure to take. However, they do pose challenges that are unique. Exposure settings can be tricky, and there is a limited time window to take your shots. Try to apply the above tips in your next sunset photo shoots – I’m sure you’ll start getting better results. Happy shooting!
Perhaps they’re a challenge to take given the small time window during which the sun sets.
You need to be very attentive and fire off many shots during the few seconds the sun goes down. It is also useful to apply multiple exposure settings in these kind of shots.
This article will show you some tips for shooting beautiful sunset photos.
 Tip 1: Get a Full View
When shooting sunsets, it’s important to position yourself so that you get a full view of the sunset. An example is to perch yourself on a high point. Another good idea is to catch the sun reflecting off water. I also like to photograph the sun setting between the leaves of trees. Think about different, creative ways of viewing a sunset. It will help enhance the beauty of your shots.
Tip 2: Keep Shooting
Here’s another tip for shooting sunset photos. Keep shooting! This is very important because there is only a small time window during which the sun sets. Get in as many shots as you can and select the best. With practice, your sunset photos will start looking better and better.
Tip 3: Clouds
When shooting sunset photos, clouds make a nice backdrop. Clouds add color and texture to an otherwise uninteresting photo. Try to look for cloudy skies to add more variety and texture to your photos.
Tip 4: Shooting Off-Center
Another tip I recommend is to shoot the sun off-center. It’s not essential to keep the sun right in the center of the photo. You can position the horizon at bottom of the frame, so that you can highlight the sky, or perhaps focus on a subject in the foreground. Try this, you can get many interesting silhouette effects.
Tip 5: Use Multiple Exposure Settings
A good thing to try is to use multiple exposure settings. I use a technique called bracketing (which simply means shooting the same picture at different exposures) to get the best shot. If the picture is too bright, underexpose it and vice versa. To bring out details of a person in the foreground, try using the fill flash or night mode. Experimenting with exposure is very important for getting the best looking sunset photos.
Tip 6: Zoom In
Always bring along a telephoto lens when shooting sunsets. That way, if you suddenly have an urge to make the sun larger and more impressive, you can simply zoom in. Some of the best shots of sunsets I’ve seen are done with long focal lengths in this manner.
Conclusion

Depth of Field
From Wiki,
 In optics, particularly as it relates to film and photography, depth of field (DOF) is the distance between the nearest and farthest objects in a scene that appear acceptably sharp in an image. Although a lens can precisely focus at only one distance at a time, the decrease in sharpness is gradual on each side of the focused distance, so that within the DOF, the unsharpness is imperceptible under normal viewing conditions.

In some cases, it may be desirable to have the entire image sharp, and a large DOF is appropriate. In other cases, a small DOF may be more effective, emphasizing the subject while de-emphasizing the foreground and background. In cinematography, a large DOF is often called deep focus, and a small DOF is often called shallow focus.
The DOF is determined by the camera-to-subject distance, the lens focal length, the lens f-number, and the format size or circle of confusion criterion.
 For a given format size, at moderate subject distances, DOF is approximately determined by the subject magnification and the lens f-number. For a given f-number, increasing the magnification, either by moving closer to the subject or using a lens of greater focal length, decreases the DOF; decreasing magnification increases DOF. For a given subject magnification, increasing the f-number (decreasing the aperture diameter) increases the DOF; decreasing f-number decreases DOF.
When the “same picture” is taken in two different format sizes from the same distance at the same f-number with lenses that give the same angle of view, and the final images (e.g., in prints, or on a projection screen or electronic display) are the same size, the smaller format has greater DOF.
Many small-format digital SLR camera systems allow using many of the same lenses on both full-frame and “cropped format” cameras. If the subject distance is adjusted to provide the same field of view at the subject, at the same f-number and final-image size, the smaller format has greater DOF, as with the “same picture” comparison above. If pictures are taken from the same distance using the same f-number, and the final images are the same size, the smaller format has less DOF. If pictures taken from the same subject distance are given the same enlargement, both final images will have the same DOF. The final images will, of course, have different sizes.
Cropping an image and enlarging to the same size final image as an uncropped image taken under the same conditions is equivalent to using a smaller format under the same conditions, so the cropped image has less DOF.
When focus is set to the hyperfocal distance, the DOF extends from half the hyperfocal distance to infinity, and the DOF is the largest possible for a given f-number.
The advent of digital technology in photography has provided additional means of controlling the extent of image sharpness; some methods allow extended DOF that would be impossible with traditional techniques, and some allow the DOF to be determined after the image is made.
Combined by,
Shahnawaz
Hope you find it helpful.
 In optics, particularly as it relates to film and photography, depth of field (DOF) is the distance between the nearest and farthest objects in a scene that appear acceptably sharp in an image. Although a lens can precisely focus at only one distance at a time, the decrease in sharpness is gradual on each side of the focused distance, so that within the DOF, the unsharpness is imperceptible under normal viewing conditions.
In some cases, it may be desirable to have the entire image sharp, and a large DOF is appropriate. In other cases, a small DOF may be more effective, emphasizing the subject while de-emphasizing the foreground and background. In cinematography, a large DOF is often called deep focus, and a small DOF is often called shallow focus.
The DOF is determined by the camera-to-subject distance, the lens focal length, the lens f-number, and the format size or circle of confusion criterion.

When the “same picture” is taken in two different format sizes from the same distance at the same f-number with lenses that give the same angle of view, and the final images (e.g., in prints, or on a projection screen or electronic display) are the same size, the smaller format has greater DOF.
Many small-format digital SLR camera systems allow using many of the same lenses on both full-frame and “cropped format” cameras. If the subject distance is adjusted to provide the same field of view at the subject, at the same f-number and final-image size, the smaller format has greater DOF, as with the “same picture” comparison above. If pictures are taken from the same distance using the same f-number, and the final images are the same size, the smaller format has less DOF. If pictures taken from the same subject distance are given the same enlargement, both final images will have the same DOF. The final images will, of course, have different sizes.
Cropping an image and enlarging to the same size final image as an uncropped image taken under the same conditions is equivalent to using a smaller format under the same conditions, so the cropped image has less DOF.
When focus is set to the hyperfocal distance, the DOF extends from half the hyperfocal distance to infinity, and the DOF is the largest possible for a given f-number.
The advent of digital technology in photography has provided additional means of controlling the extent of image sharpness; some methods allow extended DOF that would be impossible with traditional techniques, and some allow the DOF to be determined after the image is made.
Combined by,
Shahnawaz
Hope you find it helpful.
Sunday, March 27, 2011


The art of overhead photography
Canadian photographer Alain Paiement brings geography back into the visual arts
Quebec-based photographer Alain Paiement's works are evidence that digital manipulation is not the devil but a tool that an artist can employ to achieve hitherto unscaled heights. And at a height Paiement indeed is. The artist's works stretch the claustrophobia of the everyday to an awesome Lego-land, a meticulous cutand-paste of composite imagery that recreates the jigsaw puzzle that comprises urban living. A bakery or an apartment are thus delineated with a cartographer's obsession, encompassing within a frame everything — the awning, the wall, the staircase, the room, the bath, the back door, the back staircase and, in the case of the bakery, garbage cans at the latter end of the spectrum complete a consumption cycle even.
At other moments you are privy to a corseted urbanity, of a more private kind. His use of characters in a shower or a bathtub is a good measure of how his craft can explode the imploded, how the claustrophobic can be magnified into a more kaleidoscopic voyeurism. The overhead perspective also allows the viewer to pick up individual codes that collectively form an image here; thus a soap, a shower, a slipper: all these become the visual equivalent of alphabets by which you cobble together a syntax.
Filmmakers have been historically fascinated by the overhead shot for its navigational prowess, from Hitchcock to Brian de Palma to Gaspar Noe. Noe's Enter the Void, set in the neon-tainted, drug-addicted underworld of Tokyo, has milked the format to experimental extremes, thus giving the film a psychedelic and emotional edge. Paiement's concept of urbanity is more vanilla in comparison, but he makes up for it by packing in the details.
Also, what could have been the victim of over-cleverness or gimmicky flourishes is in fact the culmination of remarkable rigour here. Hundreds of photographs have been composited, re-aligned, manipulated and collated to create a seamless illusion of Paiement's homemade geography. The artist has shown extensively in Japan, China, Europe and the States. This exhibition itself is collaboration between the government of Maharashtra and the ministry of international relations in Quebec, which is great news. Maps, after all, are meant to bring the world closer.
Friday, February 4, 2011
The Basics of RAW files {and what to do with the darn things}
Raw. It’s the ultimate test of someone’s acceptance of your status as a professional because it’s one of the first things that a mildly keen just-starting-out-er will pick up on in their search for photography knowledge. But even though it’s one of the first things you’ll likely learn, it’s also one of the most confusing elements for a beginner.
I’m a control freak. I don’t want to work my butt off to pull every element of an image together and then lose control of my colour temp in post processing. I want to control everything about the final product. If it were possible, I would even come to every single one of your houses and calibrate the world’s computer screens to see things exactly the same. Before you can love raw, you have to understand it.
{Basically…}
If you’re shooting in jpeg and you hit the shutter to let all the beautiful light flood your sensor and record the image onto your memory card, the camera collects the information and quickly compresses it down into a reasonably sized file. It judges things like the colour of the sky and the temperature of the light. Even when you’ve taken the image in manual mode and set everything yourself, the jpeg still needs to make some decisions as it smooshes all that information into one little file.
But if you shoot in raw, the sensor stays hands-off and says “ok, hot shot. YOU deal with it!”
…this means that you have total, blissful control of your entire image.
…but not without some work of your own.
RAW files need to be imported into a computer program like Adobe Lightroom or Adobe Camera Raw and then either instantly exported as jpegs (yikes!)
…or perfected according to your vision for the image with editing and then exported as a jpg or other printer-friendly format.
So just to make sure you get it I’ll say it this way: a raw file isn’t an image. It’s information gathered by the sensor and delivered to you on a memory card. It’s totally your job to then do what you want with that information before compressing it into an ‘image’.
Also, a raw file won’t usually have included the in-camera sharpening that jpeg compression provides. So don’t fret when you think your image isn’t as sharp as it should be – this also needs to be done by you in the post production editing process.
Here are some links to set you on your path to opening and utilizing your raw files:
You can process your raws with Google’s free program called Picasa. This is an article about how to process raw files in Picasa and this is a list of supported file types.
This article from Apple is FAQs about processing your raws in iPhoto
Bridge is another option and also useful if you’re likely to be utilising many different Adobe programs from your computer. Exe: Photoshop, Illustrator, etc. It’s a base from which you can spring to any of these programs. If you’re only using PS, it’s not really necessary, although Helen Bradley has a great post on about the ways she thinks Bridge is useful.
This is a tutorial written by me, before I learned how to make videos. Full of screen shots to show you how I import my files into Lightroom and export them out when I’m finished editing.
This is the Wikipedia entry for ‘raw image format’. Scroll down to ’software support’ and you’ll find a pretty huge list of software at your disposal for processing your raw files.
Getting that sunset on lens....
The concept is simple and works well for those further from the equator. Sorry everyone in the lower latitudes, the sun doesn’t move that far North to South for you to worry about this too much. For those of us from about the 10th parallel all the way to either Pole, this trick should be handy for making the most of your sunset photo time.
You will need a calendar. If you like the online version, here’s one for you for 2011 in ICS version. The idea is to number all the dates on both sides of the Summer Solstice or Winter Solstice equally. I start at the 21st of June and make that zero. From there, each day forward and back, is given a sequential number. Because of the number of days in a year, the calendar will have to be redrawn, slightly, each year except leap year.
The idea is to note where the sun sets on a given day, say the Vernal Equinox, to make life easy. Where I live, up by the 48th parallel, there is a mountain range across from Seattle known as the Olympics. All year long the sun marches left to right in its sunsets. When I mark on the calendar where the sun sets that day (maybe over Mt. Jefferson, for example) and check the calendar number, in this case 93, then I know that on the corresponding date in the Fall, the sun will be in the same position. This just happens to be a few hours before the day of the Autumnal Equinox, again, making life easy.
Armed with this calendar or a simple printed version, it is easy to plan ahead. This is handy if you are not able to shoot a sunrise or sunset on a given day or know of a better angle than the one you currently occupy. My first memory of this calendar idea was seeing a photo of the sun beaming down a street in New York City. The caption noted the photographer had seen that same view the year before and made a note to bring their camera to work in a highrise on the same day the next year. Maybe you notice the sun rising from under a bridge on your way to work or setting perfectly over a lake but can’t stop to take a shot. Make a note to revisit the missed photo on the other side of the Solstice.
I hope this simple trick helps you record, and enjoy, more great days outdoors with your camera. It can certainly have many uses beyond sunrises and sunsets and I’d love to hear of unique applications of the idea.
Tuesday, January 18, 2011


Subscribe to:
Posts (Atom)